
Brand Avatars and Greeting Messages
Before the launch, there were several steps for setting up chats.
Brand avatars
Sometimes brands participate in conversations with users. As on social media accounts: users really love to talk to brands. In in-app chats it’s crucial—to answer users' questions, help them to find some important information, or just stay in touch.
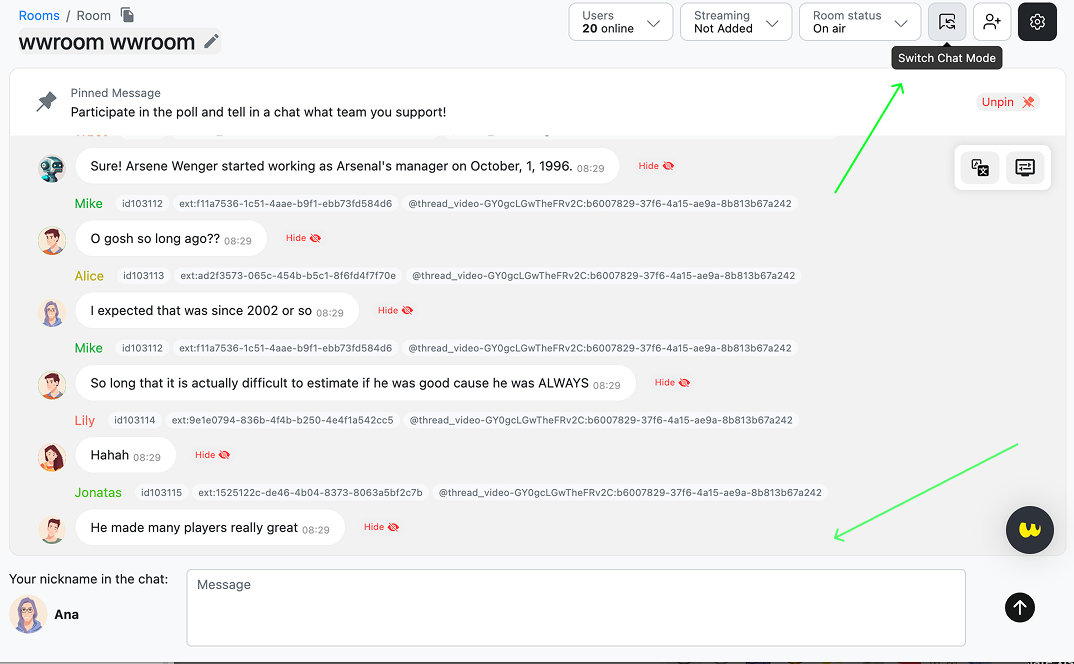
You can just upload it through the admin panel to answer from the account with a branded avatar. Also, you can upload the user avatar for the admin account or any other account, when entering the specific room. Open the list of participants and click the avatar of the needed user:
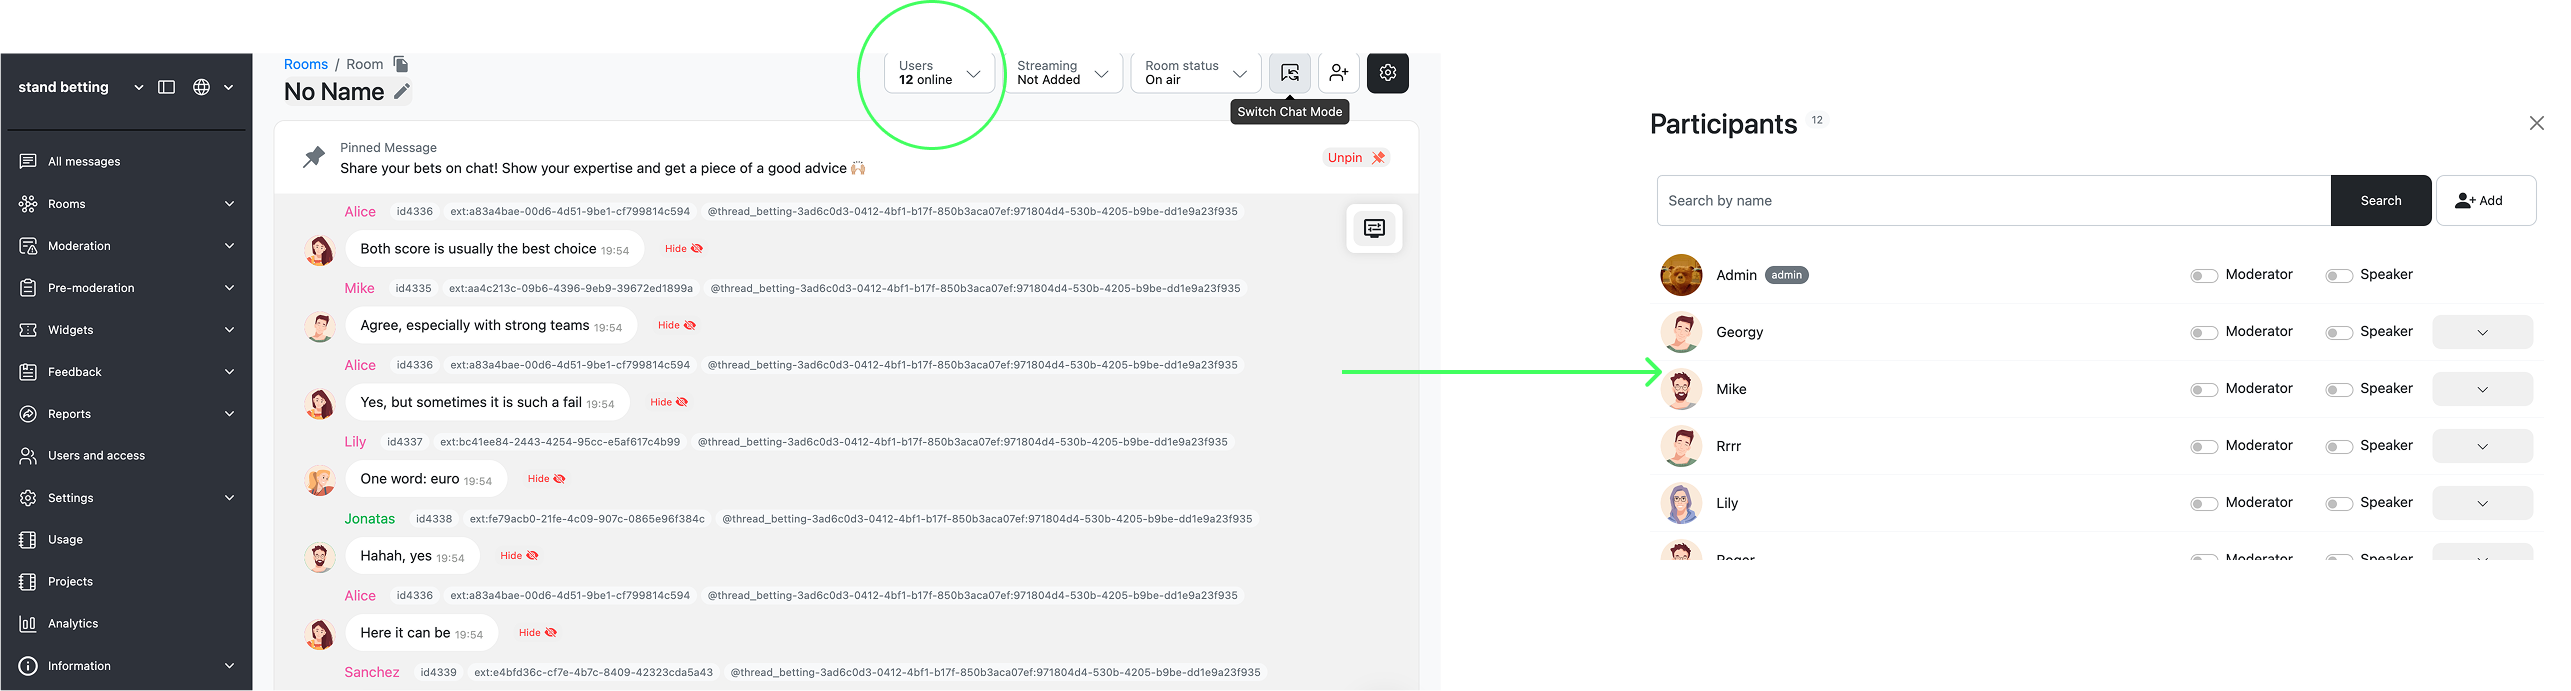
Then, you can text in chats using the in-put line on the page below or by switching the chat mode.
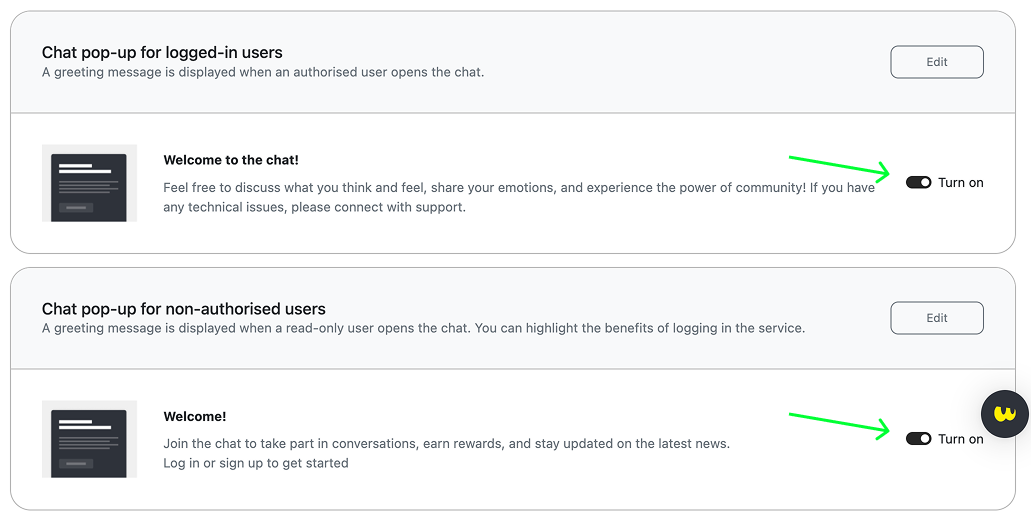
Greeting (informative) pop-up
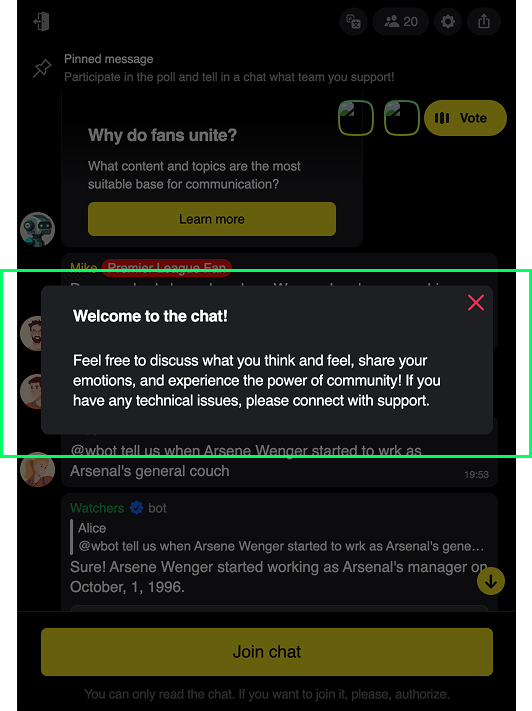
You can set a greeting or informative pop-up through the admin panel. It onboards users and explains what they can do in chats, or you can sue it to share some important news or information about new features.
There are two options for pop-ups:
- the one for logged-in users
You can set a one-time pop-up that users will see after joining a chat for the first time or the one shown aevery time users join the chat. Use it to welcome them or to share important or just curious updates.
- pop-up for unregistered users// for read-only mode
Use it to convert users to registered—explain what they need to do for joining the chat
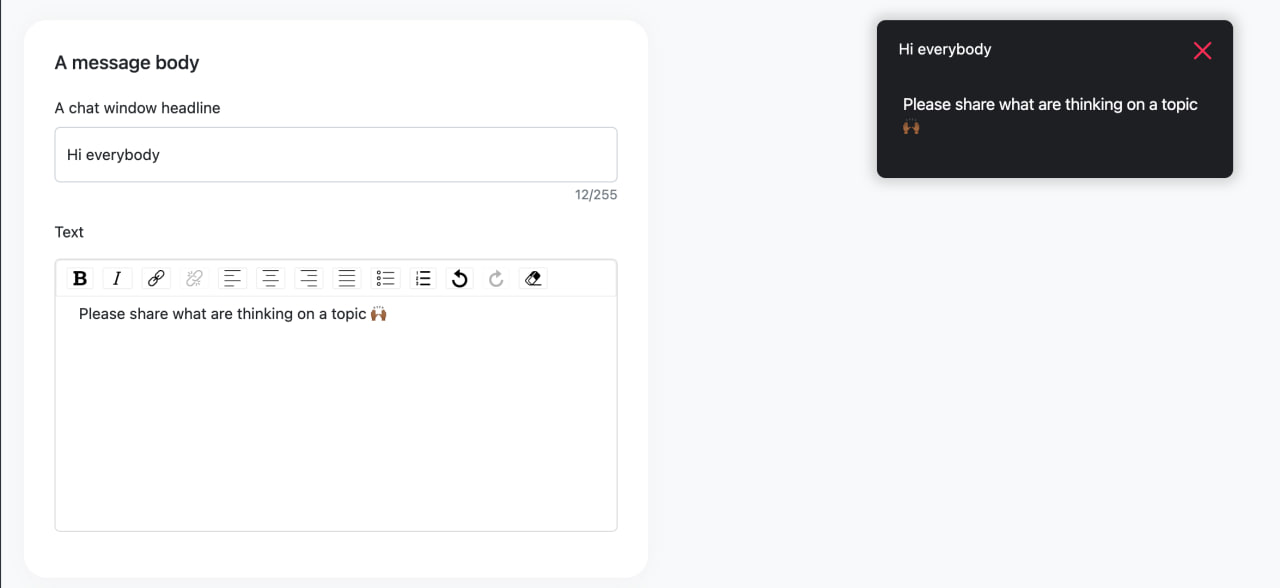
To set the pop-up, open the Widgets section on the admin panel and choose “Greeting message (pop-up)”, choose the option you need (or set both), and click on the button ”Set”. Then add a headline, text body, and button with a link, if needed. Next, you need to choose how often users will see it. You can check its appearance while setting it. Also, you can add variants of the pop-up for all available languages.
Note that you can use this pop-up not only to greet users but also to inform them about new features or even to tell them something nice.
After finishing all setting, ensure that your pop-up toggle is enabled.
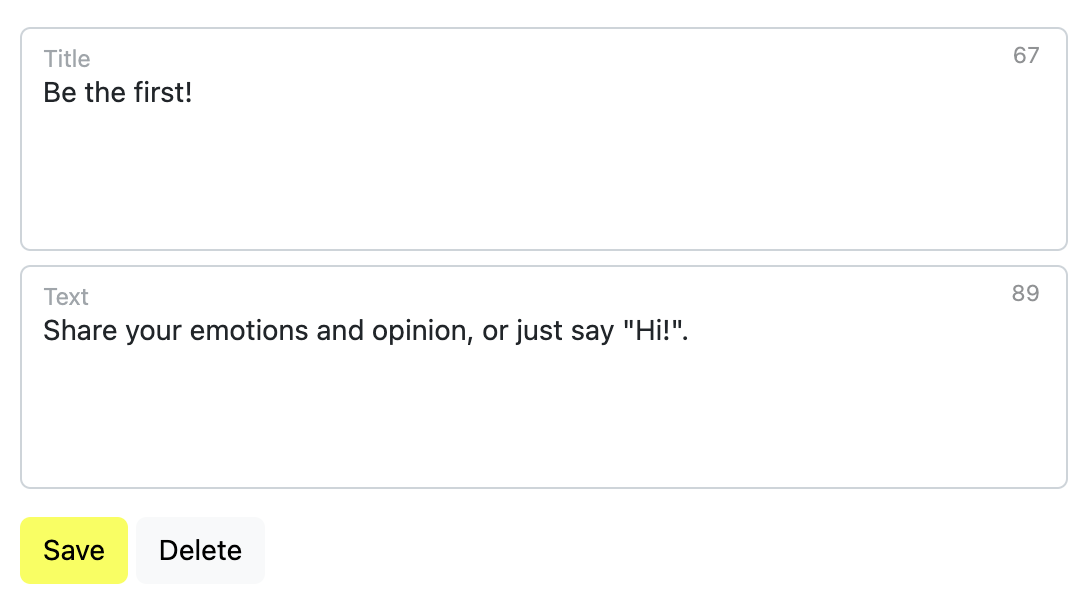
… and a placeholder for an empty chat
It’s important what the first user who joins a chat can see. Help them to find what to do—being the first is the most difficult. You can use the empty chat placeholder to explain what users can do in chats or what they should type here. It’s easy to set this message up for different languages.
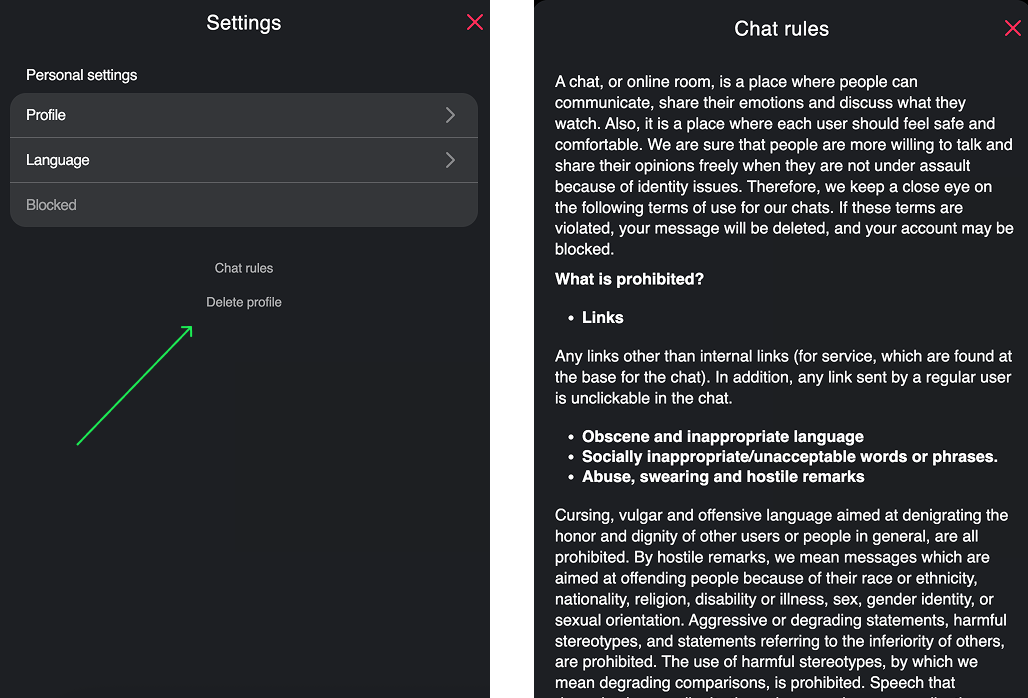
In addition, you can set up chat rules for various languages. Both can be done in the Language and localisation section of the Settings.
Admin panel settings view
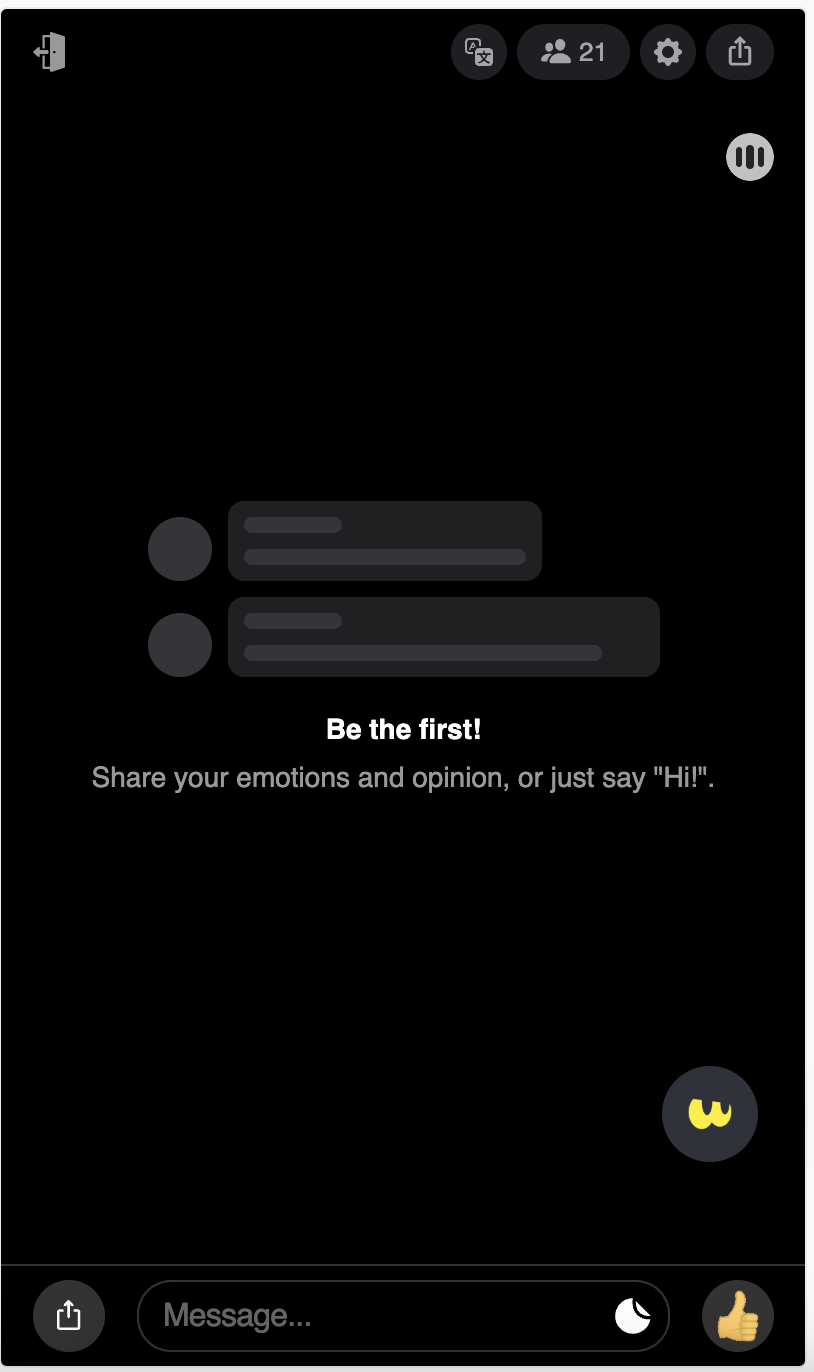
Chat interface view
In the same section,** Settings > Language and Localisation,** you can find an opportunity to add Chat rules for users. These rules will be available on their chat profile and after blocking. Chat rules can be added for all available languages.
Updated 6 months ago