
Pop-Up Marketing Offers
Can be personalised, sent manually or through your CRM system
These pop-ups can include an image, a button with a link or promo code, and a description. They can be sent to all available chats, selected ones, or customised for individual users—manually or via API.
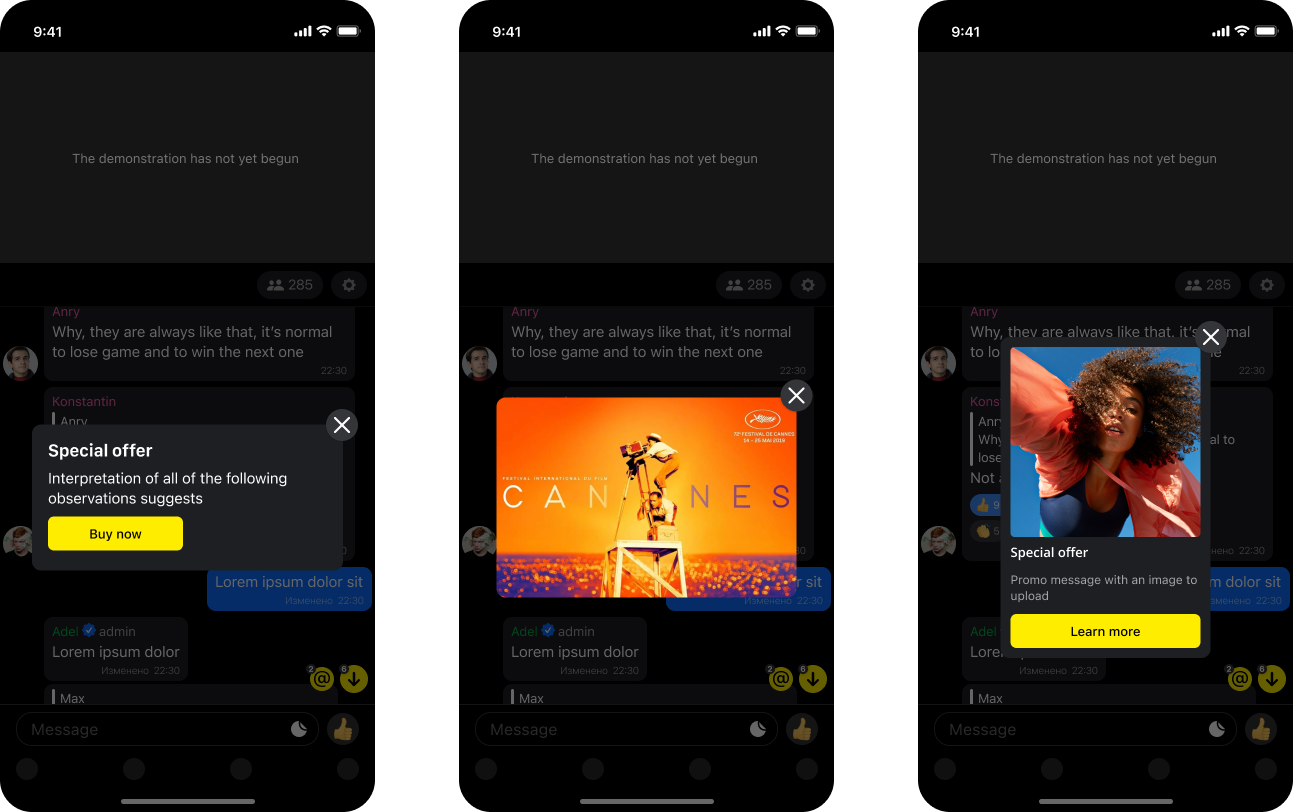
Pop-ups are clickable and displayed as an overlay over the chat; the user can close them by clicking the close button.
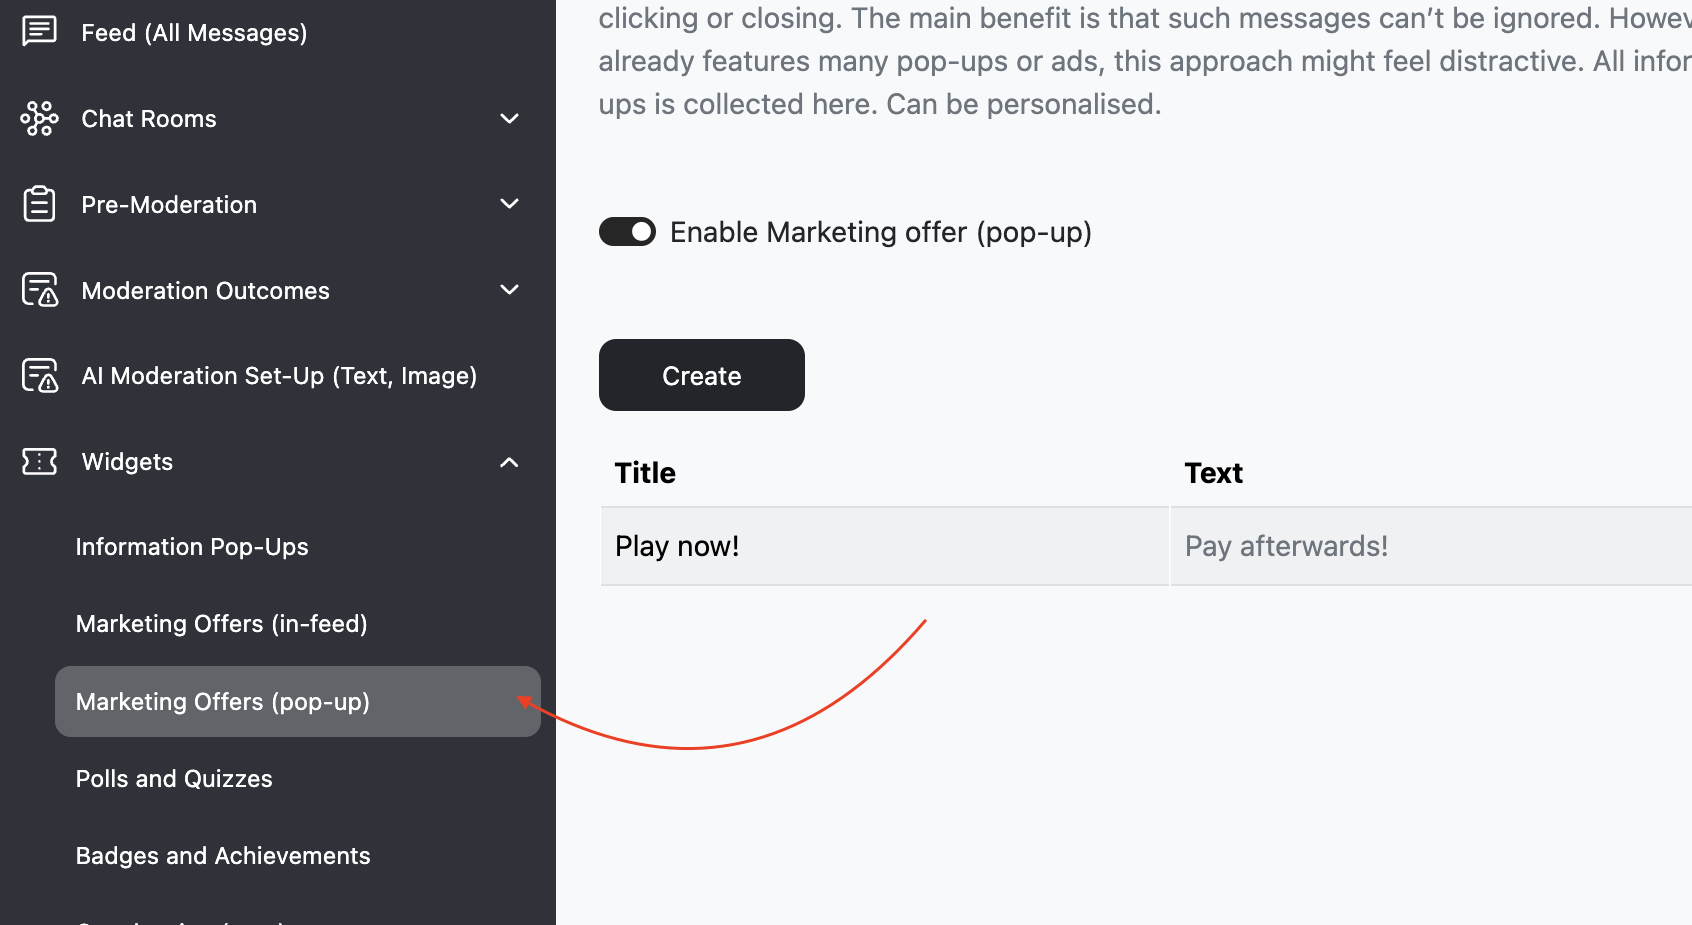
To set up manual sending, open the Widgets > Marketing Offer (pop-ups) section, then click the Create button.
Templates
Choose the most suitable template: some of them contain an image and text, also you can pick the one with just a text or just an image (relevant if you reuse marketing banners).
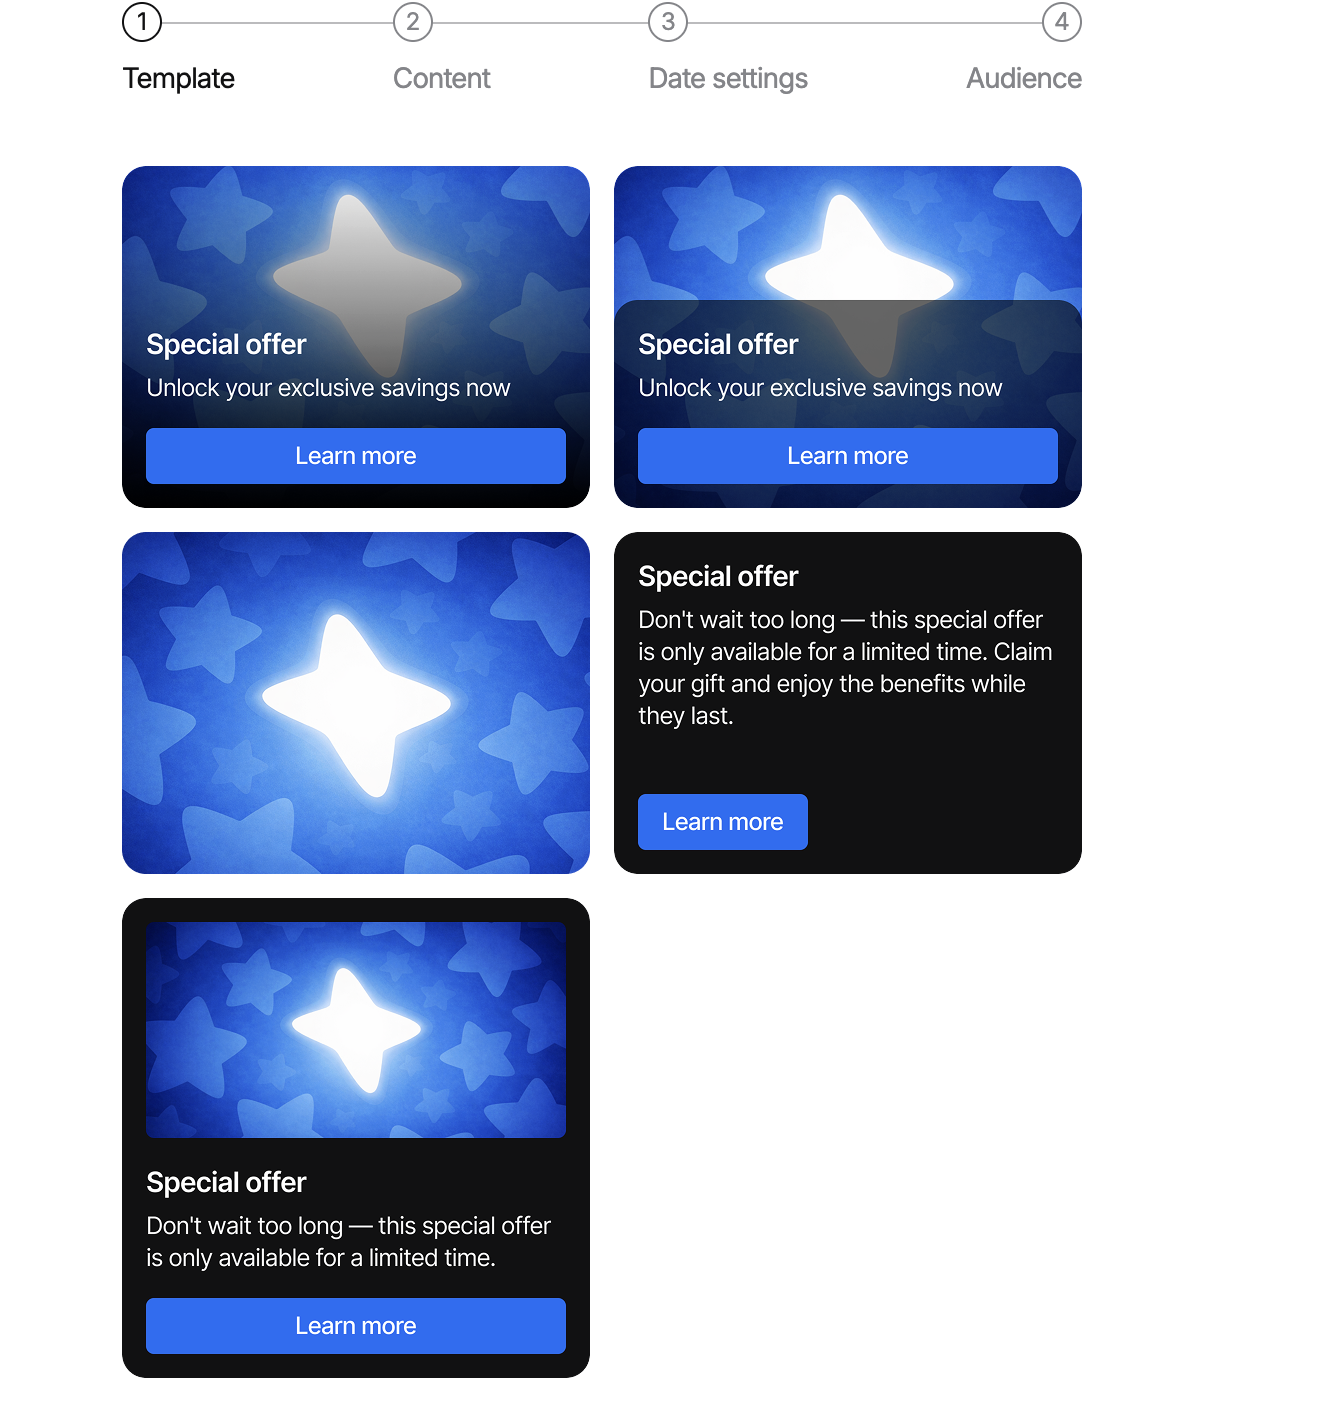
If you choose a template, then during the pop-up creation, decide to change it, it is possible.
Pop-up body
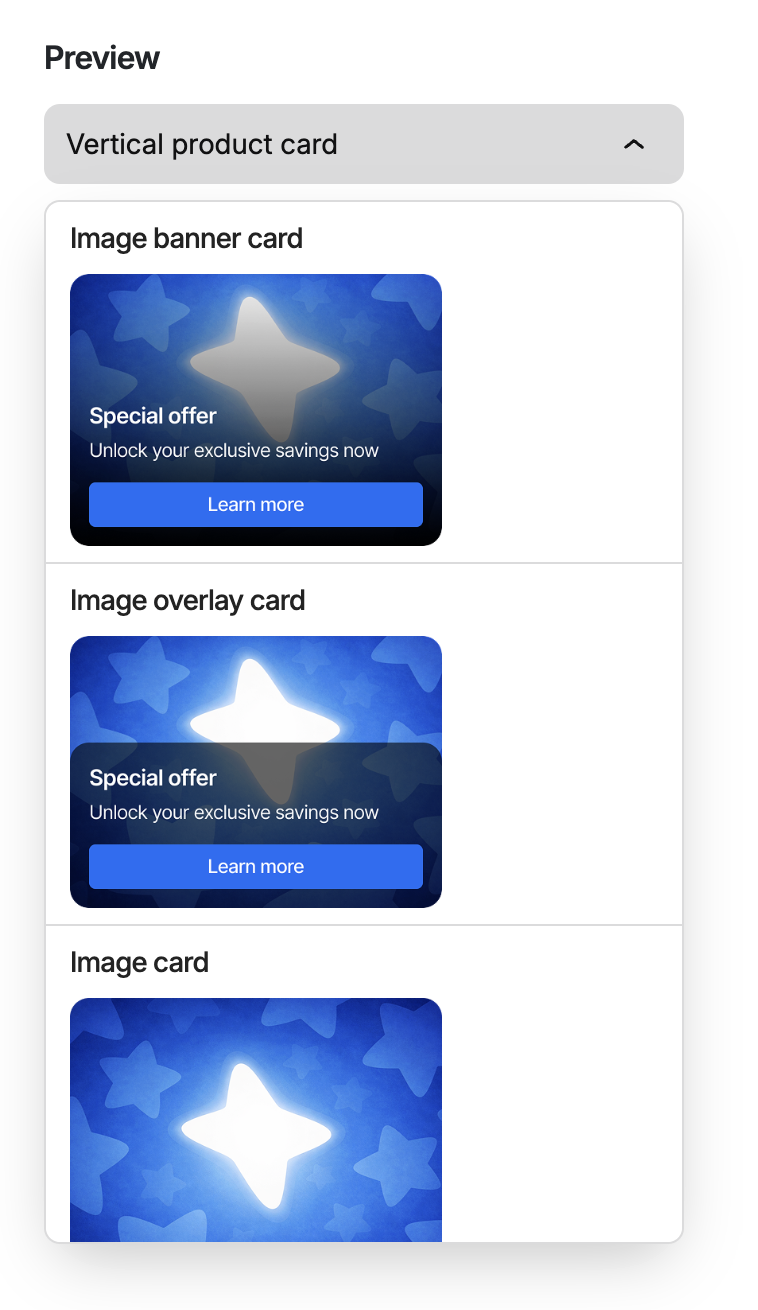
Then, configure the offer itself.
On the right side of the page, you can see your offer preview. It is available for both light and dark modes.
After selecting the template, add all the necessary elements.
Upload the picture if it is presumed, and fill out all needed text fields. You can also add translations for all needed interface languages, or add just the default variant, and for other languages, texts will be translated automatically.
Fallback Behaviour
If the content for a certain language is missing, the system will automatically show the pop-up using the default service language. If a tab is partially filled, for example missing the button text or link, the missing fields will also fall back to values from the default language.
Preview Switching
Switching between language tabs updates the visual preview accordingly, helping admins double-check how each localised version will appear to users.
If everything is filled out correctly, the fields will be highlighted in green. If there are critical errors (e.g., a required field is missing), the section that needs correction will be highlighted in red.
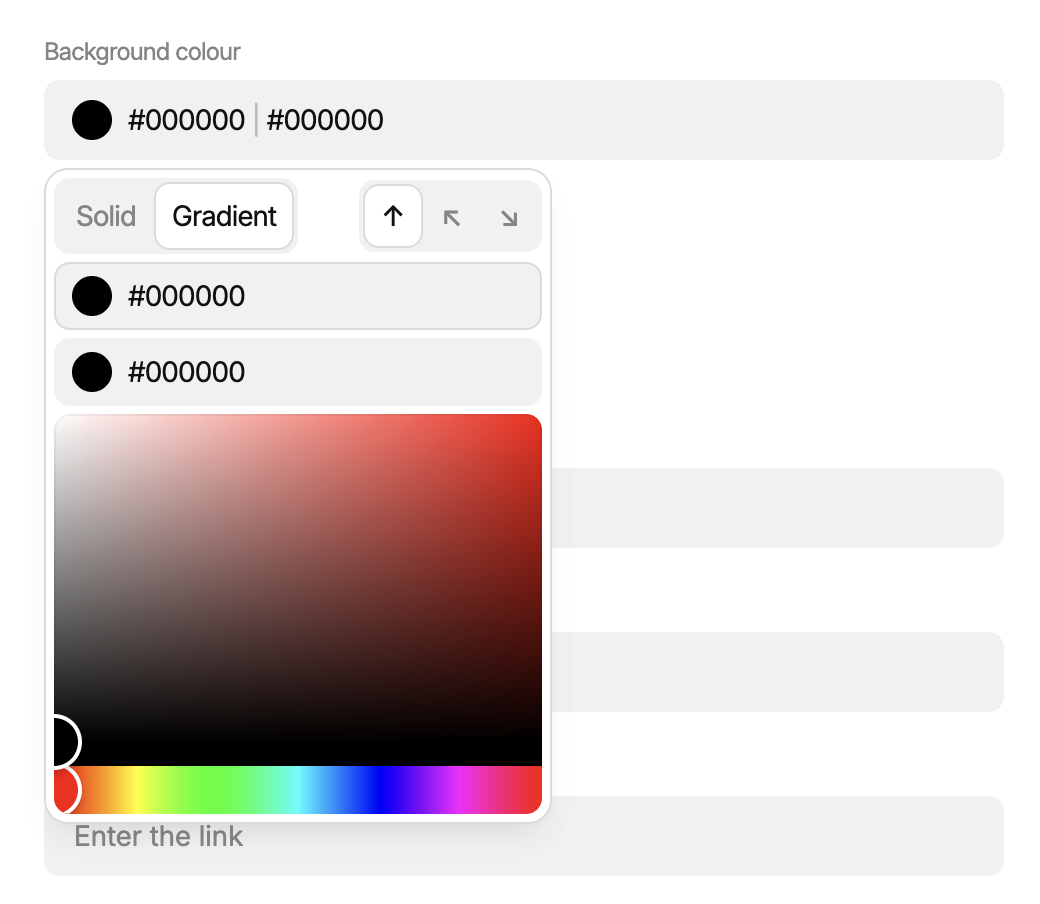
You can choose colours for the background and button. Choose solid or gradient colouring.
Button link or promo code
You can choose what to put into the button: the link or promo code.
If you choose the link, you also need to decide how this link will open: in the same window, a new window, or with a post message.
If you choose a promo code, when your users click the button, the code will be copied.
Timeframe settings
Choose how many times you want to show this pop-up to your users.
If once, just set the date for the start and for the finish of the offer (the pop-up will be shown to users who join the chat during this period).
If several times, you need to specify a time frame several times, decide how frequently your users will see this offer: daily or every time they join the chat.
Also, specify the delay for a pop-up appearance if needed—for example, users could see the pop-up in 5 seconds after joining the chat, which can be a better idea than showing marketing offers at once.

Audience settings
Select the audience for the pop-up.
You can send it to all rooms (this means that all users who enter any available chat on the platform will see the notification), to selected rooms, or customise a specific list of users.
For personal offers, there are two configuration options:
- Manually (you upload a list of users, either by entering them comma-separated in a special field or by uploading a CSV file with a list of UserIDs)
- Via API.
Please note, that you can configure either sending by rooms or by users in the following hierarchy:
- Personal offer by userId: Specifies target users for the offer. If they are specified, the offer will be shown only to these users when they enter the chat.
- Public offer by roomId: If user IDs are not specified, the pop-up can be displayed in specific rooms. If room IDs are not specified, the pop-up will be sent to all available chats.
This approach works for both manual configuration through the admin panel and sending via API.
After specifying to whom and where to show the notification, click "Send."
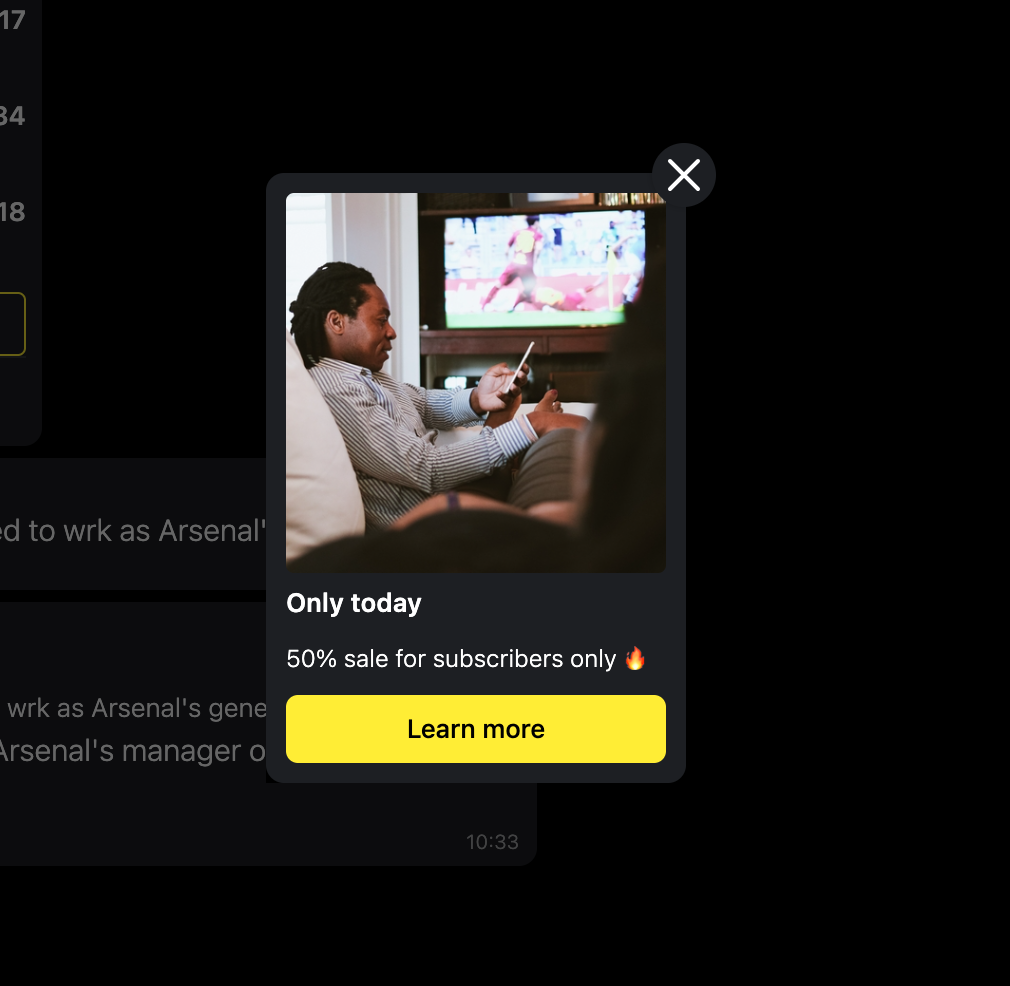
Your pop-up is ready, received by the user, and clickable:
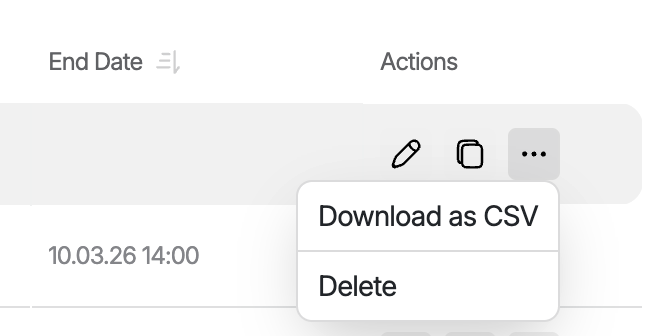
Data about published pop-ups
All published pop-ups are gathered in the same section. You can find the buttons to manage them: edit or delete, and all the main info about the pop-ups. You can edit it even after they are published, but you cannot change the rooms or users in the audience settings.
You can download the list of users who viewed your pop-ups.
When you start creating a pop-up, you can save it as a draft. However, only one draft can be saved at a time.
You can also create this widget a through the "Duplicate" functionality. To do this, select the appropriate button in the table.

Updated 17 days ago