
Interface Customisation
You can fully personalise the visual style of the chat interface to match your product's identity.
Watchers allows you to customise:
- Colour schemes and design tokens via Figma + Tokens Studio plugin
- Icons for both dark and light themes
- Fonts used across the chat interface
- User avatars, stickers, reactions, and animoticons
Customising the colour schemes
Follow this step-by-step guide to customise the chat styles using Figma and Tokens Studio plugin, and apply them to your Watchers chat interface.
Remember that it’s not necessary to edit all of the token. You can start with base colours, background styles, and message colours. Possibly, editing the rest wouldn’t be required; they will inherit the palette’s colours by default, and you need them for detailed settings.
Step 1: Open the Style Library
Open the master style library via the link below:
👉 Open Style Library
This file contains all the base design tokens used for chat customisation.
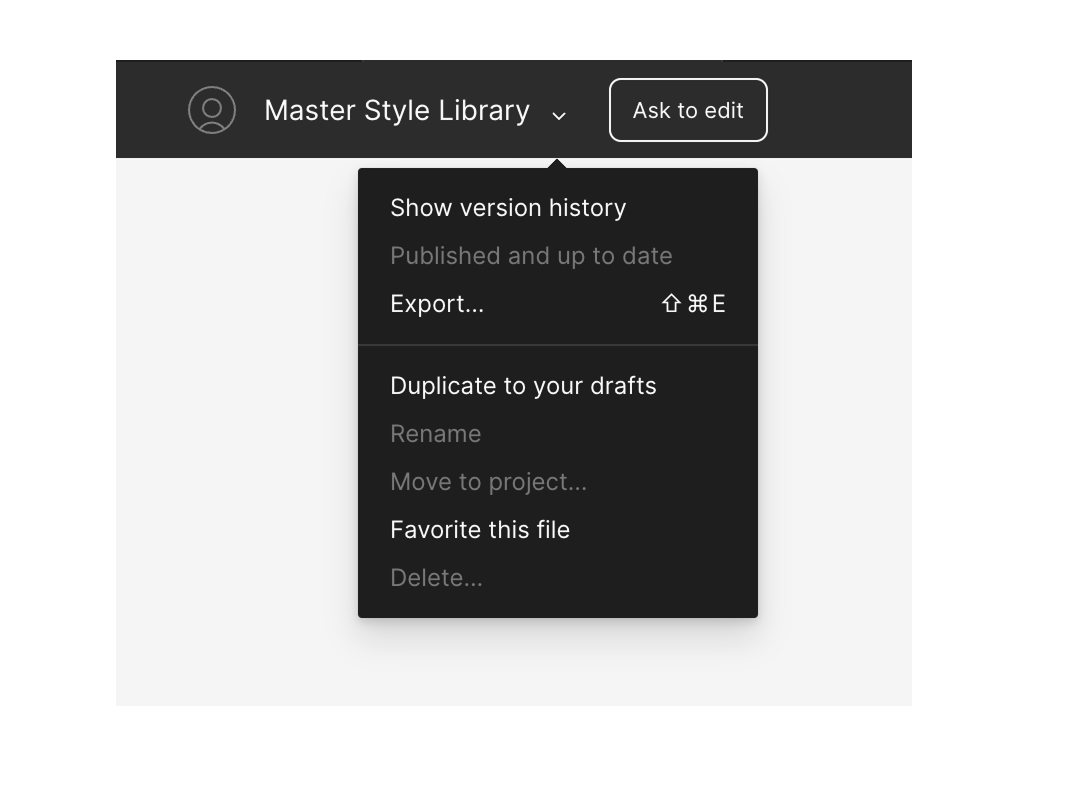
Step 2: Duplicate the File
- Click the file name at the top of the Figma interface.
- Select Duplicate to your drafts to create your own editable version.
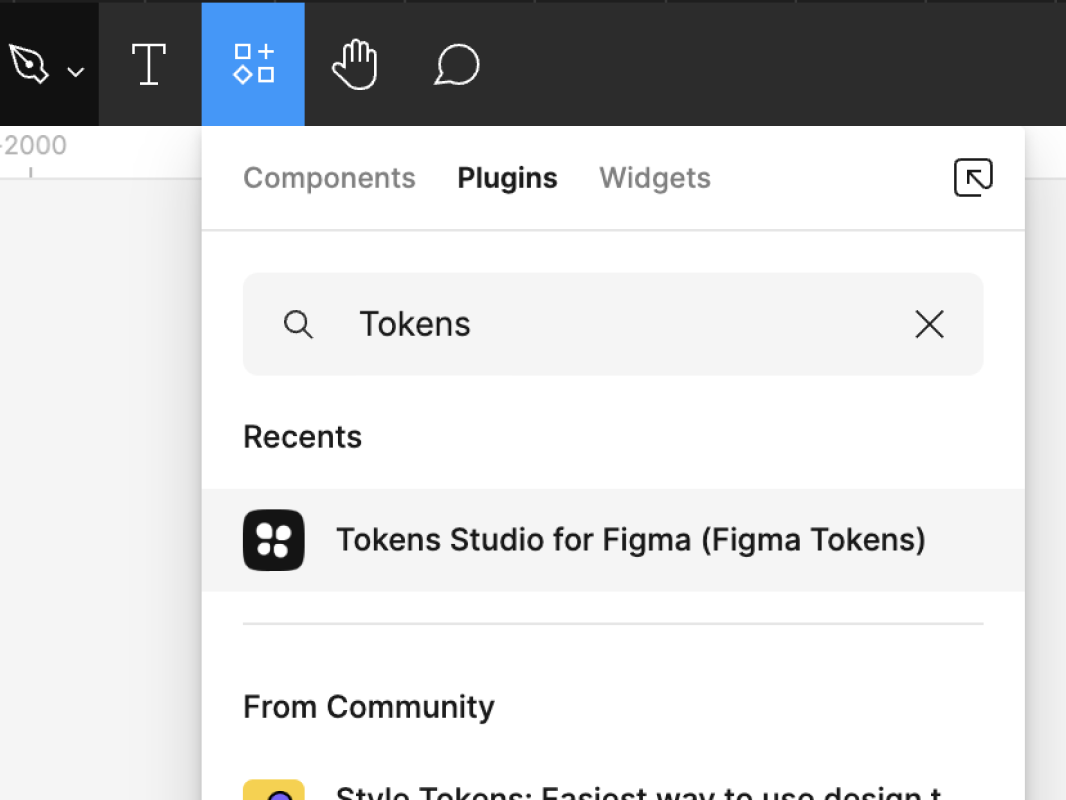
Step 3: Install the plugin Tokens Studio for Figma
- Click the Resources icon in the Figma toolbar.
- Go to the Plugins tab.
- Search for Tokens Studio for Figma.
- Click to install or open it.
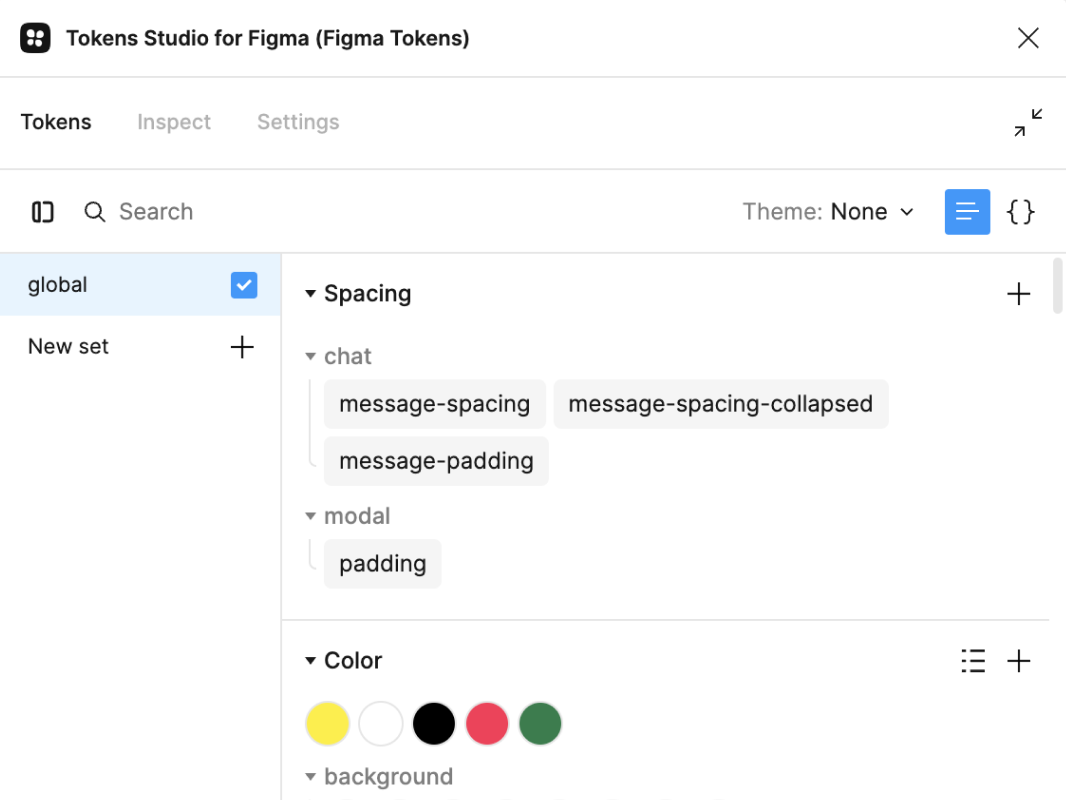
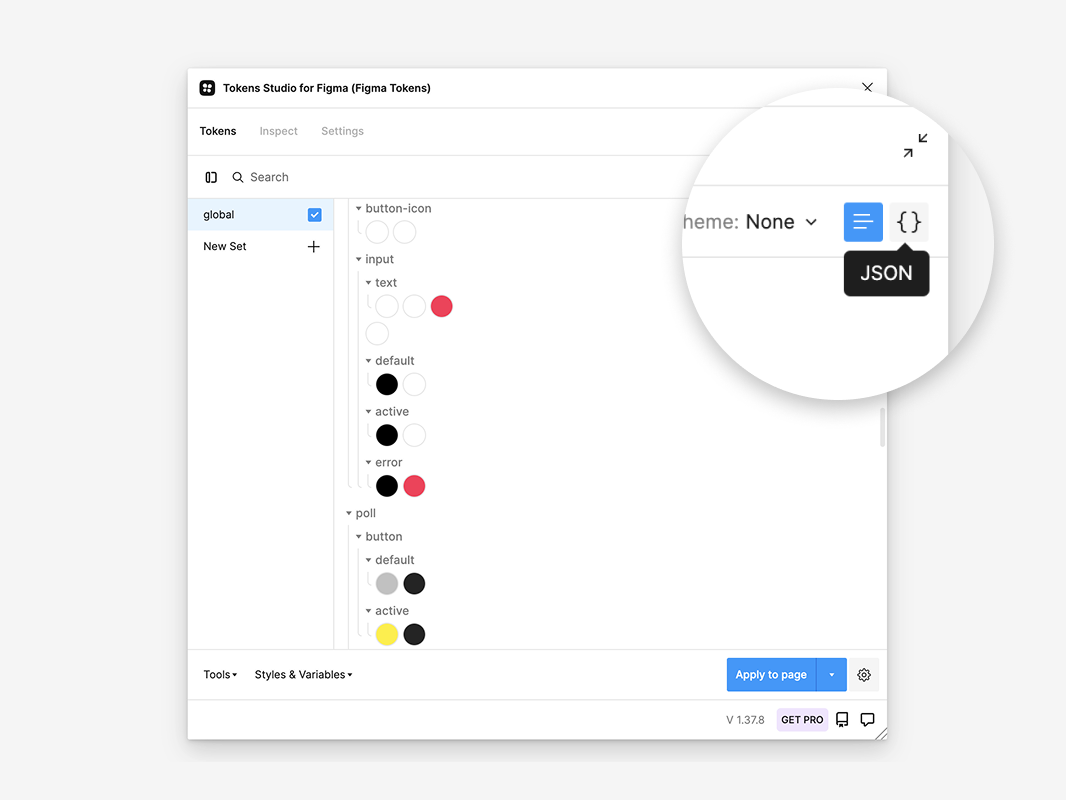
Step 4: Explore the Chat Tokens
In the plugin window you will find token styles you could customise to change appearance of the chat
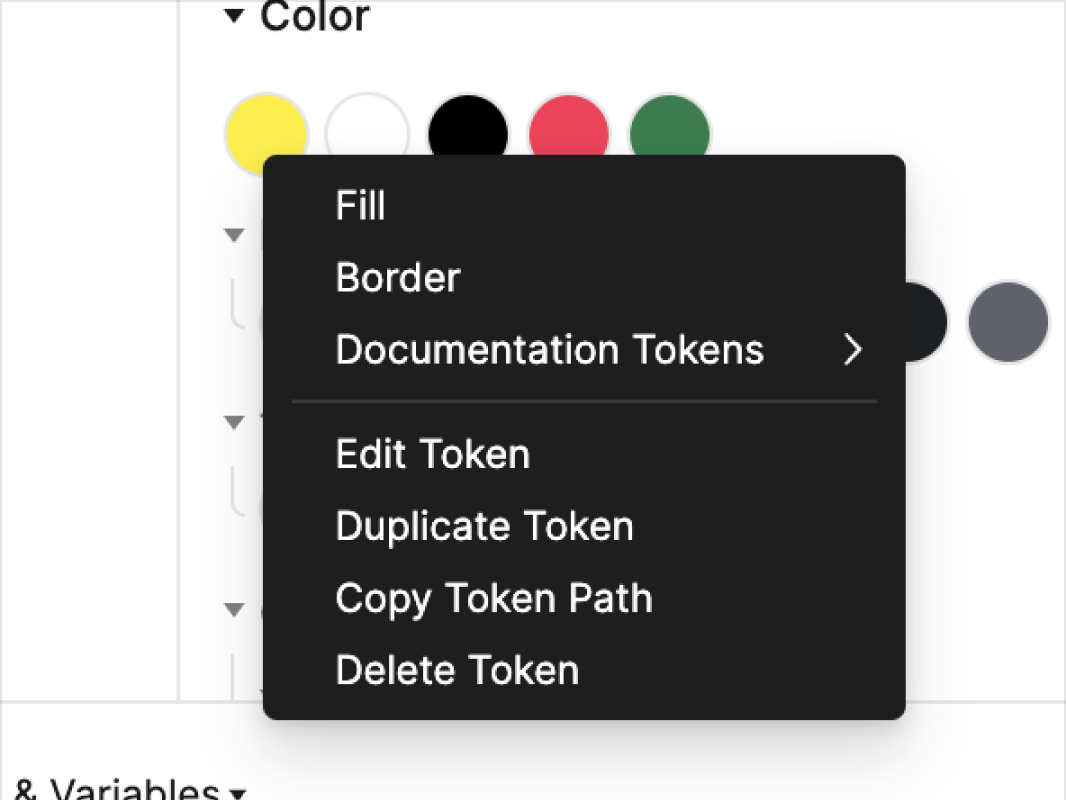
Step 5: Edit Tokens
To update any token:
- Right-click on a token (e.g. a colour circle).
- Select Edit Token.
- Update the values (e.g., colour codes, spacing values).
Step 6: Export the JSON
- Once you’ve finished customising the tokens:
- Click on the
{}JSON icon at the top right of the plugin panel. - Copy the entire JSON content.
Do not paste the JSON into intermediate tools like Notepad, MS Word, email clients, or messengers before inserting it into the Watchers Admin Panel.
These tools may automatically reformat or alter the characters (e.g. quotes, line breaks), which can corrupt the JSON and cause the customisation to fail.
✅ Always copy the JSON directly from Tokens Studio and paste it straight into the Watchers Admin Panel.
Step 7: Open Watchers Admin Panel
- Go to your Watchers Admin Panel.
- Navigate to:
Settings → Appearance
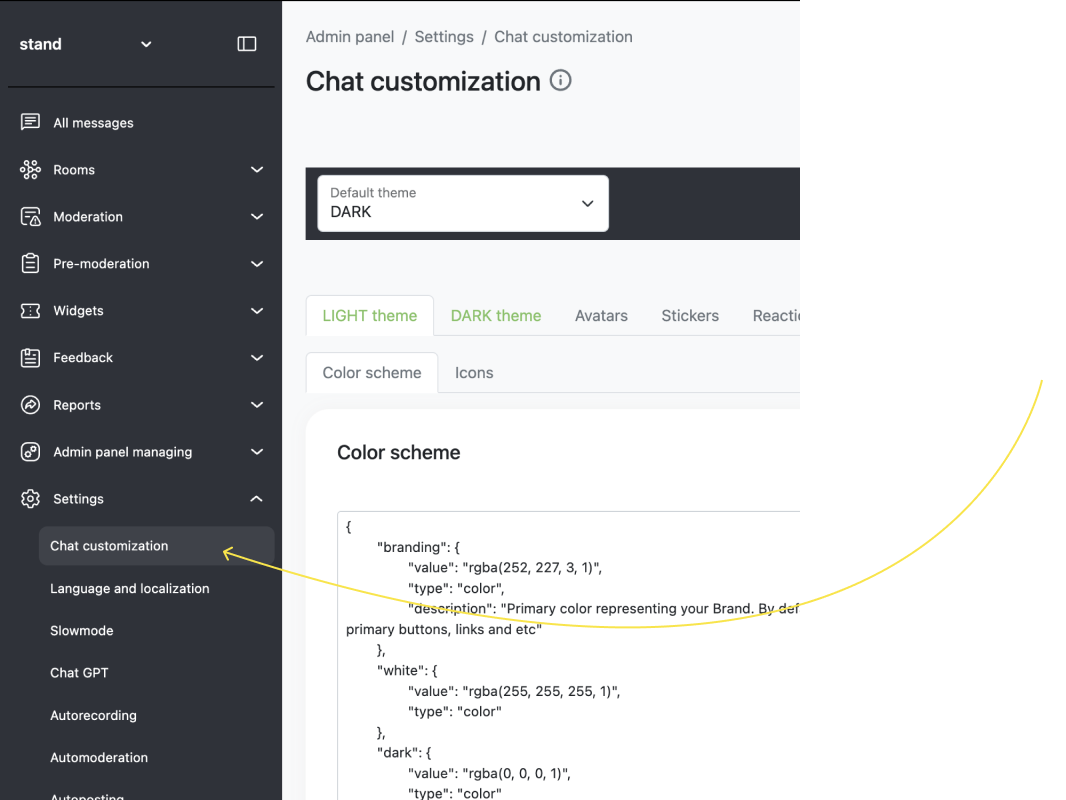
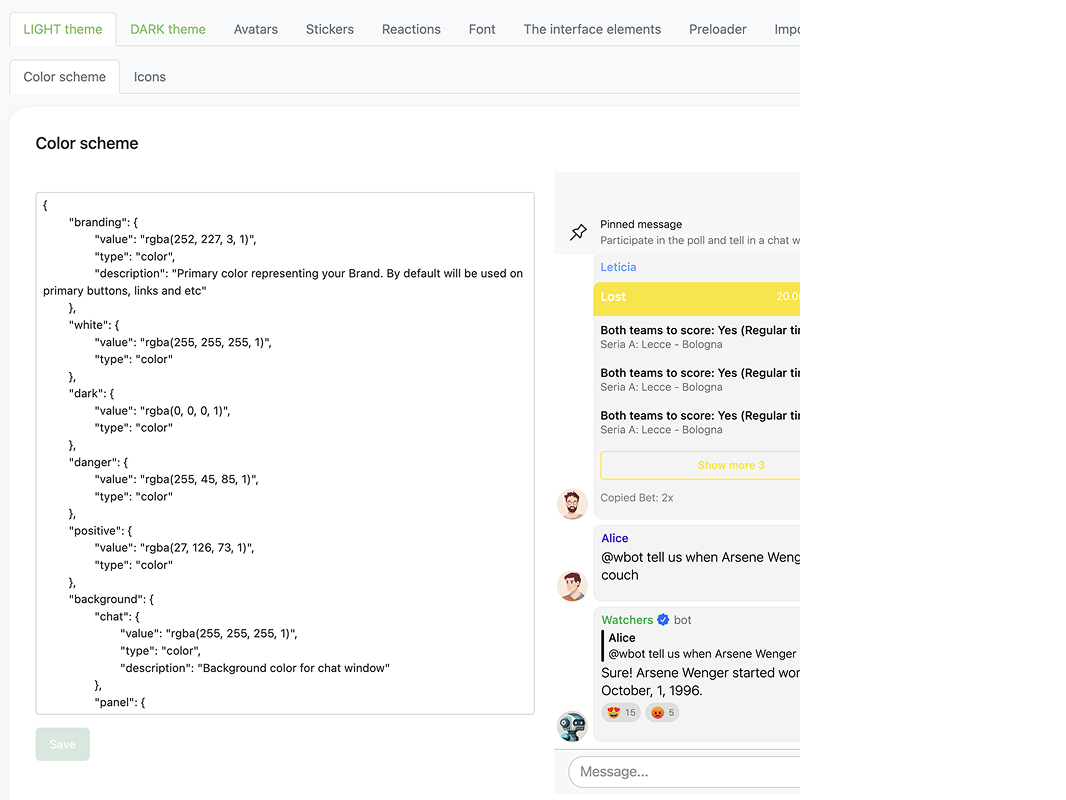
Step 8: Paste and Save
- Select the theme you want to customise (e.g. DARK or LIGHT).
- In the Appearance section, paste your copied JSON into the input field.
- Click Save.
Your custom chat styles are now applied!
Transparent chat background
To enable a transparent chat background, apply both of the following:
-
Theme configuration (required beforehand):
Set the background colour in the theme to fully transparent using RGBA:"background": { "chat": { "value": "rgba(0, 0, 0, 0)", "type": "color", "description": "Background color for chat window" } }This sets the chat background to transparent regardless of theme mode (light or dark).
-
GET parameter on user entry:
Passbg=transparentas a GET parameter when the user enters the chat.
Example:
https://watchers.io/?roomId=...&userId=...&apikey=...&mode=...&bg=transparent
Both the theme configuration and the GET parameter must be used together for the background to render as transparent. Without one of them, the default background will be applied.
Updating Chat Icons
You can customise any of the system icons used in the chat interface for both LIGHT and DARK themes independently.
Steps to Update Icons
- Open the Watchers Admin Panel.
- Navigate to:
Settings → Chat customisation → [LIGHT theme / DARK theme] → Icons(tab) - Find the icon you want to update.
- Click the pencil icon on the top-right corner of the icon box.
- Upload a new icon file.
Icon Requirements
- Accepted formats:
.svg,.png - Minimum size: 64×64 px
- Maximum file size: 200 KB
- SVG minimum dimensions: 16×16 px
You can update individual icons per theme, allowing full control over how your interface looks in light vs dark mode.
Customising Chat Font
You can personalise the font used across your chat interface to match your brand’s typography.
How to Change the Font
- Open the Watchers Admin Panel.
- Go to:
Settings → Chat customisation → Font(tab) - Click the Change button.
- Upload your desired font file.
🗂 Accepted Font Formats
.ttf(TrueType Font).otf(OpenType Font)
Once uploaded, the selected font will be applied across all interface elements.
Licensing Responsibility
Important:It is your responsibility to ensure you have the proper rights or licenses to use the font you upload.
Do not use fonts that are restricted, copyrighted, or require attribution unless your license explicitly allows embedding them into products.
Customising Avatars, Pre-loader, Stickers, Reactions & Animoticons
Personalise your chat even further by uploading custom visual assets for user interaction.
Pre-loader
For a pre-loader, use a file in a SVG or GIF format, no size restrictions identified.
Avatars
Steps to update:
- Go to
Settings → Chat customisation → Avatars(tab) - Click Add and upload a new avatar.
Requirements:
- File types:
.png,.svg - Size: Minimum 192×192 px
- Max weight: 200 KB
Stickers
Steps to update:
- Navigate to
Settings → Chat customisation → Stickers - Upload your own sticker sets to reflect your product’s style or seasonal campaigns.
File Requirements:
- Formats:
.PNG,.WEBP - Background: Transparent
- Size & Aspect Ratio:
192x192px(or2x, max512x512px) - Max File Size:
200 KB - Padding: Include
8pxof padding between the image and the edge of the canvas
Legal Notice
When uploading sticker files, you confirm that you:
- Have all necessary rights to use the images, including logos and visual assets
- Comply with all applicable laws
- Do not upload obscene content or any materials that violate the rights of third parties
Stickers that violate these rules may be removed and could result in restricted access to customization features.
Reactions and Animoticons
Customise the emoji-style reactions and animoticons used in your chat to better match your product tone.
Steps to update:
- Go to
Settings → Chat customisation → Reactions - Add or replace any reaction icon with your custom design.
File Requirements:
- Accepted format:
.png - Minimum size:
128×128 px - Maximum file size:
200 KB