Fan Clubs
Fan clubs let your users declare which team or topic they support and – optionally – join a private space inside the chat to talk to other fans of the same club.
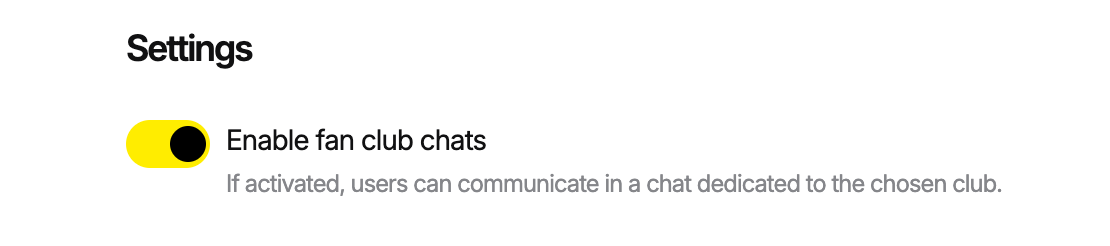
To make the feature active, enable the needed toggle in the Functional settings.
How it works for end users
Each user can pick one favourite club. Once they do:
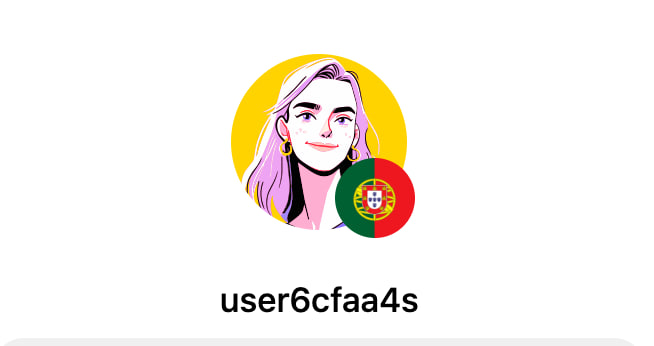
- The club's logo appears next to their avatar in every chat where they post a message — so the rest of the room can see who supports what.
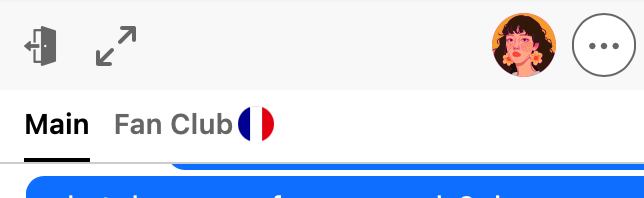
- A new Fan club tab shows up alongside Main in every room. Inside that tab, there is a separate chat that only users wearing this club's logo can post in. Users without a logo (or with a different club's logo) see the tab but get a "To participate — join the chat" prompt instead of the message input.
The flow includes two steps:
- Pick a club — opens the Confirm your club dialog with a Show logo in the chat toggle. After confirming, the user wears the club's logo. Users can just join the chat, but the logo is not shown by the avatar. You will see the stats in the admin panel for both users: those who show the logo and those who just joined the club.
- Join the fan chat — the Join the club's chat prompt offers the user to enter the fan-only chat right away. They can also Skip and join later from the Fan club tab.
YOU CAN DEACTIVATE CLUB CHATS IN THE WIDGET SETTINGS.
Users can change or remove their club in Profile → My favourite club (toggle the logo off, switch to a different club, or delete it entirely).
If you have not created any categories yet, the page shows an alert: "You don't have any categories. Before creating a club, you need its category." Use the Create category button in the alert to create the first one.
Fan chat and other settings
Decide whether you want **to add specific chats to clubs. **If you do, move a needed toggle in the section Settings and Promotion.
If you activate chats, your users will have two chat tabs: one for the main chat and one for the club chat.
Please note: if you activate a club chat, it can affect the engagement level in the main chat.
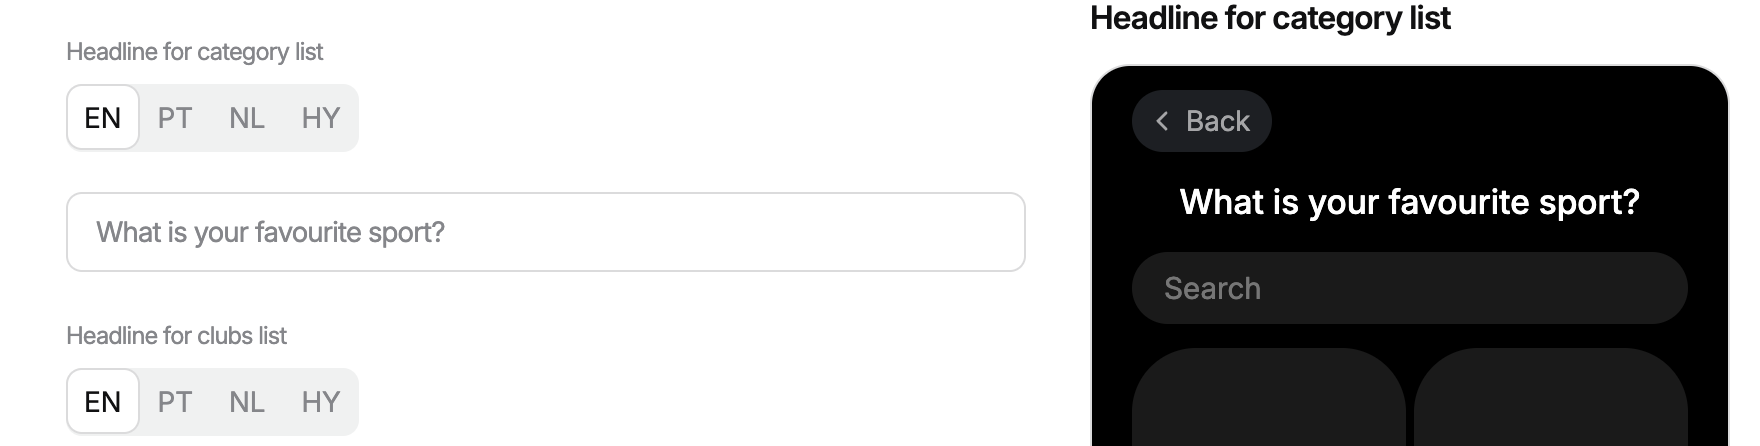
More about setting up the club promotion, read here.In settings, you can also choose the headline for categories and for clubs. Usually, it should be short CTA questions to stimulate users to choose one category or one club.
While you're adding it, you can check how it will look in the chat for users, on the preview on the right side of the page.
How it's organised in the admin panel
Fan clubs are organised in two levels:
- Categories group clubs together — for example, Football, Basketball, eSports. A category has a name (translated into every interface language) and a square cover image that users see in the picker.
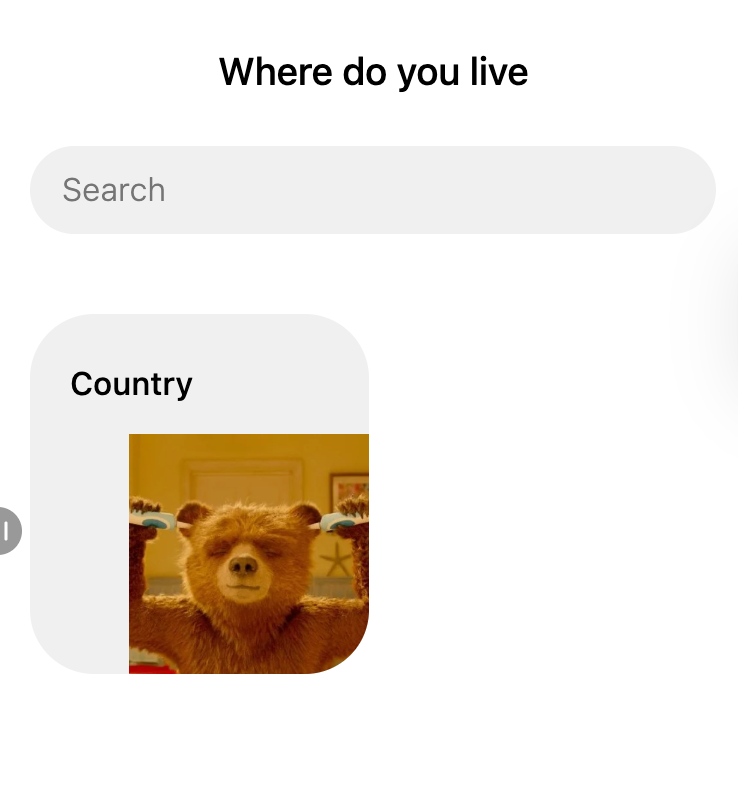
Example of the category from the user side
- Clubs live inside a category — for example, Chelsea FC, Real Madrid. Each club has its own name (also translated), logo, and a fan-only chat that opens for users who pick the club.
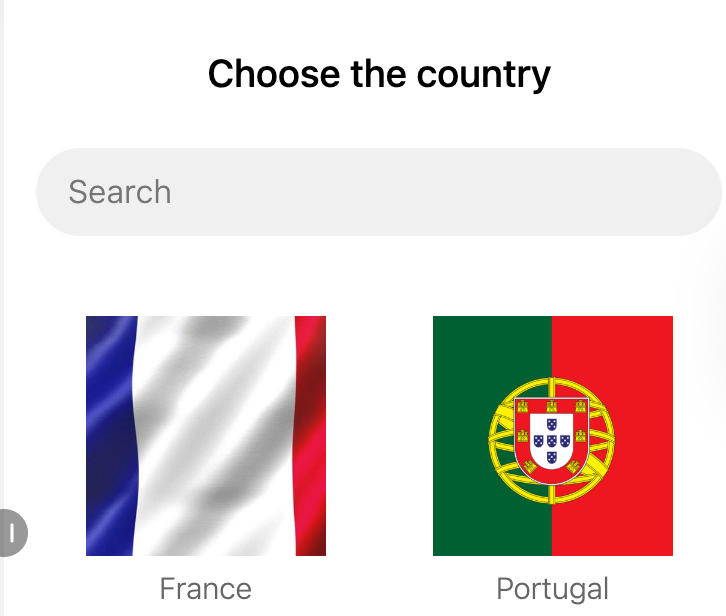
Example of the clubs from the user side
A club always belongs to exactly one category. Move a club to another category by editing it.
Browse the lists
The Fan clubs page has two tabs at the top:
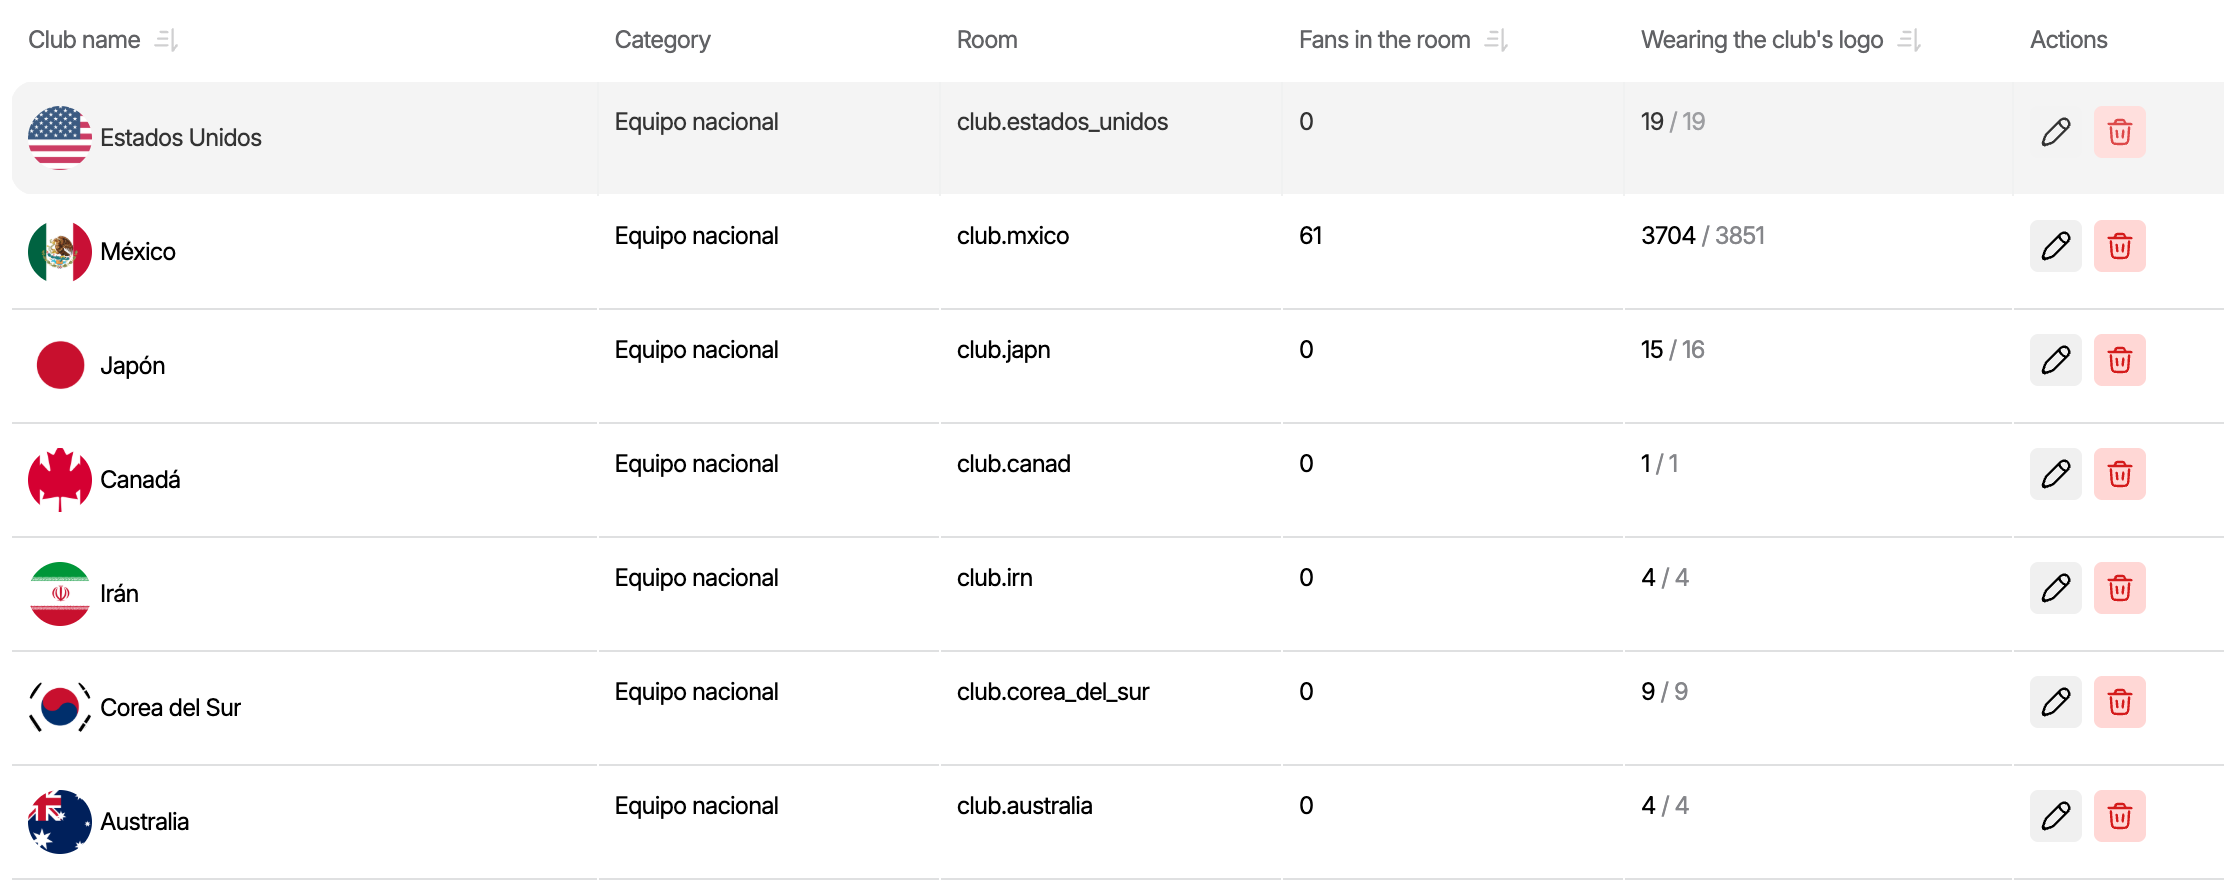
- Clubs — flat list of every club across all categories. Useful when you want to find a specific club without remembering its category. Columns: Club name, Category, Room (the room the fan chat lives in), Fans in the room (users who joined the fan-only chat), Wearing the club's logo (users who picked this club as their favourite, regardless of whether they joined the chat), Actions.
- Categories — list of categories, with a Number of clubs counter. Click a category row to open it and manage its clubs.
Both tabs support a search box at the top of the list. The Clubs tab also has a filters modal — open it from the Promotion filter chip.
If you have not created any categories yet, the page shows an alert: "You don't have any categories. Before creating a club, you need its category." Use the Create category button in the alert to create the first one.
Create a category
- Open Widgets → Fan clubs → Categories.
- Click Create.
- Fill in the form on the Settings screen:
- Category image — upload a square cover. JPG, JPEG, PNG, GIF, or WebP. Up to 10 MB. Minimum 220×220 px. Required.
- Category name — up to 45 characters. The form has one language tab per interface language enabled in your project (for example, EN and RU). The set of tabs depends on the languages you turned on under Settings → Languages Settings and Usage.
- Auto-translate — fill in the name in any one language, then click Auto-translate. Watchers translates it into every other language tab in one go. Switch through the tabs to review and tweak the wording if needed.
- The Category preview pane on the right shows how the category appears in the user's chat. Toggle Dark theme / Light theme to verify both.
- Click Create. Watchers shows "Category has been created."
The category cover and name shown in the preview are exactly what end users see when they open the category picker in the chat.
Open a category
Click any row on the Categories tab. The category page has its own two tabs:
Settings
Edit the category image and translated names. Same form as Create. Click Save to apply changes (toast: "Changes have been saved.").
The footer of the Settings tab has a Delete category action. Confirm in the modal: "Delete this category? We will remain all the clubs of this category but the users can't find them until a new category will be applied to them." Existing clubs are not deleted — they are detached from the category and stay invisible to users until you assign them somewhere else.
Clubs (inside a category)
Lists every club in the category, in the order users see them. Use this tab to:
- Reorder clubs — drag a row to change its position. Watchers asks for confirmation: "Change club order? Fans will see clubs in the app in this order. Saved positions in the category will be updated."
- Sort alphabetically — click the Sort alphabetically button to replace manual order with A→Z (toast: "Clubs have been sorted alphabetically").
- Add club — opens the Create a club form pre-filled with this category. See Create a club.
- Delete all clubs in this category — opens a confirmation: "Delete this category's clubs? The clubs might have fan rooms and team logos applied to user profiles." (toast: "Clubs have been deleted").
If the category has no clubs yet, you see an empty state: "No created fan clubs".
Create a club
- From Fan clubs → Clubs, click Create, or open a category and click Add club on its Clubs tab.
- Fill in the form on the Settings screen:
- Club logo — square image. JPG, JPEG, PNG, GIF, or WebP. Up to 10 MB. Minimum 240×240 px. Required.
- Club name — up to 45 characters. Per-language tabs and Auto-translate work the same as for categories — see Create a category. The set of available tabs comes from your project's language settings.
- Category — pick from the dropdown. The dropdown lists every existing category. The List of categories link next to the label opens the Categories tab if you need to create a new one first.
- Verify the Club preview pane on the right (Dark/Light theme toggle).
- Click Create. Watchers shows "Club has been created."
Watchers automatically creates a fan chat for the new club. The chat is bound to the club and shows up as a Fan club tab inside the room when a user picks this club as their favourite.
Open a club
A club page also has two tabs:
Settings
The same form as Create, plus:
- Room — read-only field showing the ID of the room that hosts the fan-only chat. The Room settings link next to it opens the room's full settings page, where you configure moderation, languages, brand avatars, and the rest.
The footer has Delete club. Confirmation: "Delete this club? The club might have a fan room and its logo applied to user profiles." (toast: "Club has been deleted.")
Fans
Lists every user who has joined the fan chat of this club. (Users who picked the club but skipped the chat are not on this list — see Wearing the club's logo on the main Clubs tab for that count.) The table has two columns: User (avatar, nickname) and User ID (the chat-internal id, plus the partner-side external ID if you supply it). Search by name or ID at the top.
If nobody has joined yet, you see "No fans yet.".
Tips
- The right-hand preview pane updates as you type, so you can preview translated names and the chosen image before saving.
- Categories and clubs are sorted in the order you see in the admin panel. Drag-to-reorder takes effect for end users as soon as you confirm the prompt.
- Deleting a category does not delete its clubs. Reassign them to keep them visible to users.
Statistics
You can see how many users joined the club and how many of them displayed the club icon. Also, if you activated the clubs chats, you will see how many users joined it.
To check it, open the list of clubs through the relevant tab and find the table with the list of clubs and all this information: